Use The Recovery Partition to Securely Erase Your Mac’s Mechanical Hard Drive

Here are the steps to securely erase your spinning hard drive on OS X 10.7 or later:
- Turn on the laptop and immediately press and hold down both the Command key and the R key. This instructs the computer to startup from the Recovery Partition.
- Once you see the Apple logo appear in the middle of the screen you can release the Command and R keys.
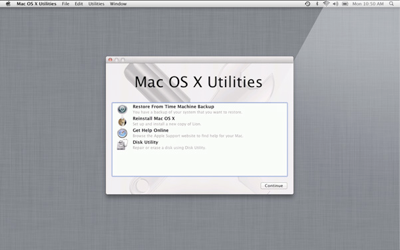
- Give your Mac a couple of minutes to startup, at which point you’ll see a window like the one this one.
- Click on the Disk Utility option from the “Mac OS X Utilities” window.
- In the left pane of the Disk Utility window, click on Macintosh HD (which is your laptop’s internal hard drive).
- In the right pane of the Disk Utility window, click the Erase tab.
- Click the Security Options button.
- I recommend that you select the 7-Pass Erase options. I think you might just see a slider, in which case you slide it to the right side labeled “Most Secure.”
- Click the OK button.
- Click the Erase button.
- You’ll be asked if you’re sure you want to erase it. You’re sure. Go ahead and click the Erase button.
Comments
0 comments
Article is closed for comments.